The intention at Richmond Grows is to be a model for sustainability in the community while supporting other communities to create their own seed lending libraries and seed swaps. All of the material is free and available for non-commercial purposes. This guide to creating a seed library is taken with permission from the group's website.
Step 1: Get Your People Together
Who is going to help you? What are some natural alliances that you can create with other community groups or businesses? Here are a few ideas:
- A permaculture guild or transition town initiative
- A local garden club
- Master gardeners
- Library or community space holders
Step 2: Locate Your Space
Get your space. We recommend a well-visited community space. Pick a venue that is frequented by the general public. We chose the main branch of the local public library since it is open to the public, widely used by a broad spectrum of citizens, and the missions of Richmond Grows and the public library dovetail nicely.
Step 3: Acquire Library Materials
You'll need a sturdy cabinet for the seeds and, of course, seeds. We recommend that you get a wooden cabinet as you are probably going to have to put some dividers in the drawers to organize the seeds into rows. The height of the drawers is important as it should be high enough to accommodate a regular-sized seed packet, but not too high as to waste space. A good height for the drawer is about 6 inches. We have three cabinets: edibles (vegetables, fruits, and edible flowers), herbs, and ornamentals (non-edible flowers, California natives, and ornamentals, such as gourds).
Things you'll need:
- Cabinets for seeds
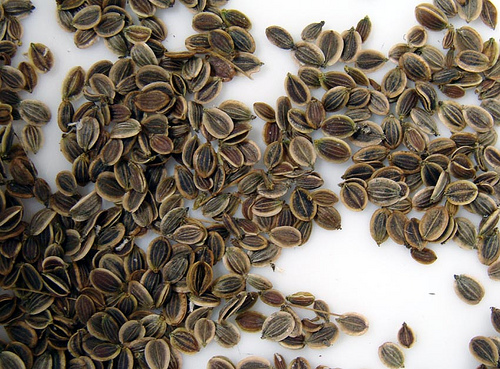
- Seeds — Write to seed companies and explain your project and the community that you will be serving; be sure to include the seed-saving aspect in your letter so that you don't get hybrid seeds.
- Labels for the outside of the drawers — Download labels below.
- Labels for dividers (in drawers) — Download labels below.
- Dividers for different types of seeds — We decided to put the labels for different types of seeds onto something sturdy and had 1/4-inch wooden dividers made that are 5 3/8" x 3 3/8". You'll need around 50 just for the vegetables and fruits.
- Wooden dividers for the drawer — Drawers are much wider than seed packets; having dividers creating rows of seeds will keep it more organized.
- 1-2 stamps for checking in and out
- 1-2 stamp pads
- Donated envelopes for borrowing seeds – Do not get envelopes with open windows; check local printers for discards; legal-sized envelopes, sealed with edge taped shut, then cut in half are a great size for people returning seeds to the library.
- A computer for members to check out and donate/return seeds — there is an open-source seed database that you can download.
Labels for Drawers
When you get your drawers for your seeds, you will need to clearly label them. The labels serve a dual purpose of helping members find and return seeds easily while educating them about plant families and the difficulty of different families to save seeds.
Our vegetables are labeled by plant families. We recommend that you put easy-to-save seeds in the upper drawers and difficult ones below.
NOTE: All of our labels are for the San Francisco Bay Area. Certain families may be more difficult in your region if you have cold winters. Besides labeling the families in each drawer and including some common family members, we also recommend that you clearly label the difficulty of the seeds to be saved.
We created three categories and these are the labels:
1. Super-Easy — We recommend using neon green paper
2. Easy — We recommend any color besides red paper — we chose aquamarine
3. Difficult — We recommend using neon yellow paperLabels for outside of drawers: The drawers for the edibles cabinet are labeled by families and we printed each family with a different color. The colors we chose correspond to the SF Bay Area Planting Guide that was created by B.A.S.I.L., our sister seed library in Berkeley, California.
Labels for inside of drawers: Remember that our categories of Super-Easy, Easy, and Difficult reflect seed-saving levels based on the SF Bay Area climate. Some families, such as the Goosefoot and Parsley families will be difficult if you have cold winters.
1. Goosefoot Family
2. Gourd Family
3. Grass Family
4. Lily Family
5. Mint Family
6. Mustard Family
7. Nightshade Family
8. Parsley Family
9. Pea Family
10. Sunflower Family
11. Miscellaneous EdiblesSeed Markers: When people check out seeds, it's helpful to have "seed markers" (kind of like book markers) available for them to stick in the drawers so they can easily return packets where they found them. We had a number of them made on card stock and used a variety of colors so if several people are using the library simultaneously, such as at an orientation, they can keep track of which spaces are theirs by using only one color of marker.
Step 4: Create Signage for Your Library
Signs you may want to have:
- Seed Lending Library sign
- New to Seed Saving poster – We took the paper to a copy store and had it enlarged to 2' x 3'. Note: These recommendations are for the SF Bay Area.
- Signs for the computer – Since our seed lending library is in the public library and some patrons come to the public library to use the computer, we chose not to have our computer Internet-connected. We wanted to avoid people from browsing on it. We added a few signs — "This computer is for Seed Lending Library members." and "This computer is NOT connected to the Internet." A third sign reminded people how to log on and asked them to e-mail us from another computer if they experience any difficulties with the program.
- How to Use the Library poster — We enlarged this to 2'x 3' and posted it on the back of used foam core and put it on a home-made easel.
Step 5: Create Your Brochures
Educating people about seed saving is an essential part of the library. Otherwise, you may get a lot of things that aren't what they claim to be. Every time we do an orientation, we distribute "How to Save Seeds" brochures and refer people to our website for additional resources. Around harvest time, we will also offer some basic seed-saving classes.
How to Save Seeds Brochures
For your convenience, we've highlighted words that you will need to switch out to reflect your organization and location.
NOTE: All of our labels are for the San Francisco Bay Area. Certain families may be more difficult in your region if you have cold winters. Contact local seed savers or refer to guides on seed saving for specifics on your area. Seed Savers Forum is also a great place to get expert advice.
Highlighted areas indicate information that you will need to change. This has been done for some, but not all, of the brochures, so please scan carefully.
How to Save Seeds Brochure – outside, English
How to Save Seeds Brochure – inside, English
How to Save Seeds Brochure – outside, Spanish
How to Save Seeds Brochure – inside, Spanish
How to Save Seeds Brochure – outside, Mandarin (coming soon)
How to Save Seeds Brochure – inside, MandarinHow to Use the Library Brochures
How to Use the Library – outside, English
How to Use the Library – inside, English
How to Use the Library – outside, Spanish
How to Use the Library – inside, SpanishHow to Check Out Seeds
We have a computer that we use with a database for people to check out seeds. If you are interested in using the database, please contact us at RichmondGrowsSeeds.org and we will connect you with the writer of the program. It is an open-source (read "free") program that was specifically written for our sister seed library, B.A.S.I.L., and Richmond Grows. You'll only need to change the name on the front page. We also have a paper backup for the computer as well as for members that are not comfortable using computers.
Step 6: Launching Your Seed Library
One way to launch your seed lending library is to have a seed swap. See our page (under construction) on how to organize a seed swap.
- Seed interchange (swap)
- Post orientation invitations on local listserves; see orientation section below
- Have a grand opening with some local officials and press
Step 7: Orientations to the Library
We chose to do orientations so that people would know how to use the library properly, as well as understand how they can make the library self-sustaining. Our orientations are a half-hour long, starting and ending promptly, but many people stay beyond that time to check out seeds and register. The focus of the orientation is on what is the library, how the library is organized, and how to check out seeds. We felt that returning seeds and discussing seed saving would be too much to take in for the initial orientation. We do pass out our seed-saving brochure and strongly emphasis what the "Super-Easy," "Easy," and "Difficult" signs mean.
Before the orientation, we posted sign-ups in the library as well as publicized orientations on different neighborhood council, garden club, and other community listserves. We used Eventbrite for our registration. It's a free service.
Since we only have one computer and people often want to check out seeds after the orientation, 10-12 people is about the maximum that we recommend for an orientation if you have only one computer.
Here is our orientation material. We enlarged each piece to 2' x 3' and then put them on a large flip-chart easel.