Design is often characterized by its products rather than its processes. Tell someone you’re a designer, and the first question they’re likely to ask is: “What kind? A graphic designer? A fashion designer? Maybe an architect?” But the artifacts produced by these specialists are not what define design. Design is about problem solving and opportunity seeking, not predefined material outcomes. It’s about seeing problems as opportunities for innovation rather than obstacles to progress—and, as the Shareable community knows, simply creating more products isn’t the solution to all problems.
Design is capable of much more. In addition to products, communications, and environments, designers today are creating whole new services, systems, and experiences. The field is expanding: taking on new challenges, bridging new disciplines, and inviting new practitioners. As a sharer, you might be a designer yourself. By developing new collaborative consumption strategies and cooperative business models, you are practicing design, whether you know it or not. The goal-oriented creativity that goes into these projects can be largely intuitive, so it often goes unrecognized or simply uncharacterized as design. However, with some simple design strategies, you can be more deliberate about what you do intuitively and better direct your creativity to meet your goals.
Whether you’re planning a small charrette or a larger project, there are some basic elements, common to most design processes, that you may want to incorporate. By no means do these elements constitute the definitive design process. Like all design processes, the one below is a variation, an adaptation, a hybrid methodology. It’s also not as linear as it might seem in writing. You should expect to cycle through and repeat some stages of the process as new insights and information emerge. Use what works for you, experiment, and integrate your own techniques. Your process is yours to design. Hopefully, the following suggestions will simply provide some guidance through the challenging work of creating something new.
This year, we’ve seen Mutual Aid in Motion.
From scaling sharing hubs to Mutual Aid 101 trainings, we’re helping communities build the tools they need.
Every dollar fuels lasting resilience – proving that when we move together, we all move forward.

Preparation

Before getting started, you can take some steps to create the conditions for a successful project. The first is to understand the scope of your project and clarify the expectations of everyone involved. Simply stating a timeframe for the project will go a long way towards establishing what you can realistically hope to accomplish. Design doesn’t work without deadlines, so set up a schedule with enough time allocated for each of the stages of your process. Your project could take place over a day, a month, or a year, but all the milestones should be mapped out ahead of time. Designs have a way of never really being done, so it’s important that you make them due at some point.
You will also want to prepare a workspace that’s conducive to creativity. Design can happen anywhere: in a studio, at the office, or on the back of a bar napkin. But you’re likely to be most comfortable working in an environment that encourages experimentation and play. Often, this is somewhere you can spread out, post things up on the walls, and make a bit of a mess without anyone getting too upset.
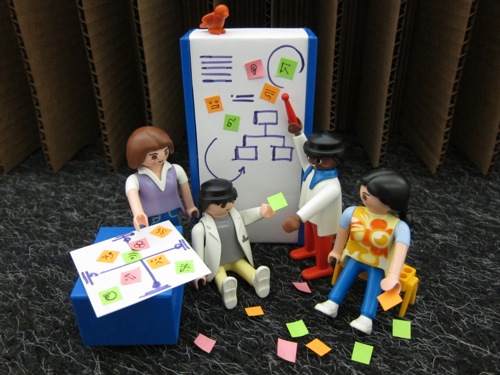
The different stages of the design process will call for different materials, but you will be surprised how much can be accomplished with some simple office supplies and a little improvisation. At the very least, you always want to have something on hand to write and draw with. Markers are preferable to pens and pencils, because they can be read from a distance by your collaborators. Large pieces of paper or white boards are also useful for quickly visualizing ideas for everyone to see. And don’t forget Post-It notes, of course—lots of Post-It notes. These lovely little stickies are ideas just waiting to happen!
More Tools and Tips:
- Whether you’re looking for a co-working space or a design studio, Shareable.net is full of information about the kinds of environments that inspire creativity and collaboration: Designing Workspaces for Collaboration (Shareable)
- Stanford’s D School is a space designed expressly for collaborative design projects. Read about their modular “T-Walls” and DIY whiteboards in the new book, Make Space: It’s all about the space at Stanford’s design school (Stanford)
Collaboration

It’s increasingly rare to design alone these days. Almost any design project will benefit from the exchange of ideas and diversity of perspectives afforded by collaboration. When tackling complex challenges, you will often need to assemble a team with a broad range knowledge and expertise. Indeed, collaboration is becoming increasingly necessary—but that doesn’t mean it has gotten any easier. Two heads are only better than one when they work together well. Diverse, interdisciplinary teams may generate more innovative ideas, but they can also be prone to internal communication problems.
No two collaborations are the same. Each will present different challenges, but there are some common strategies you can use to minimize confusion and conflict in most cases. For starters, simply select a manageable number of teammates: 3 to 7 will usually provide enough different points of view without complicating decision making too much. These may not be the only people you work with during your project, but they will be the core team responsible for seeing it through. You may also want to bring in expert consultants to help you troubleshoot particular problems, or reach out to users and stakeholders to help you actively co-design solutions. In any case, you should assign roles and define hierarchies as much as possible, so that everyone knows what to expect from each other. If possible, designate a process facilitator who is in charge of watching the schedule, keeping people on task, and mediating conflicts—but ideally, not directly involved in making final design decisions. Finally, you should insist that everyone give each other the trust and respect necessary to feel safe to freely share ideas.
More Tools and Tips:
- Northumbria University has compiled some techniques that may be useful in managing role definition, conflict resolution, and communication in your design collaborations: Design Collaboration
- “Co-design” is an increasingly popular collaborative method aimed at attuning solutions to users’ needs by strategically involving outside stakeholders in the design process: Co-design (UK Design Council)
Orientation
The basis of a design project is the brief. This is the challenge, opportunity, or problem you hope to address, exploit, or solve with your design. In some cases, it may seem obvious, but it should never be taken for granted. Your brief will determine the direction of your entire project: how you define a problem will largely define its solution. So, before seeking any solution, you should be sure you’ve found the right problem. Framing this problem is as much a design opportunity as finding its solution. Reframing an old problem in a new way is often the key to developing an innovative solution.
How you articulate your brief will influence how you approach it, so it’s important to get the wording right. Instead of writing it like an assignment or a command, consider asking it as a question. “How might we…?” is a common way to begin. A question about how you might do something tends to leave more room for creativity than a statement about what must be done. Keep it open-ended, but be realistic about what you’re asking. Include some specifics about the people or place you are designing for rather than trying to take on the whole world at once. State the situation too broadly, and you will get lost in possibilities; articulate it too narrowly, and you will get trapped in limitations. The most fruitful design briefs provide a healthy balance of freedom and constraint.
More Tools and Tips
- Even when your design brief comes from a client or an employer, it’s important to maintain a critical perspective, as explained in this video by IIT professor Jeremy Alexis: What is Problem Framing in Design? (Jeremy Alexis, Illinois Institute of Technology)
- This post from Big Spaceship describes the difference between “problem setting” and “problem solving” and provides links to info on “abstracting” and “wicked problems”: Finding the Right Design (Big Spaceship)
Exploration

Research is an important part of every stage of the design process. Some designers would characterize their process itself as a form of research: a sort of learning by doing. However, it’s useful to distinguish design research from scientific or scholarly research. Design research can involve some methods borrowed from other disciplines, such as ethnography or statistical analysis, but its perspective and objectives are often different. As a designer, you’re looking for inspiration not answers. You should be rigorous in your research so as not to be misled, but you should also feel free to experiment, make, and play.
If you are designing for a specific population or place, go there, meet people, and document what you find in words, pictures, and sounds. Map systems and visualize relationships that your encounter. Try to explore beyond the obvious and the average. Many insights go overlooked at edges and extremes. Instead of asking people about what they want or need, try to engage them in telling stories about what they feel and do. Listen carefully, but also look closely. Hidden in peoples’ behaviors and environments are all sorts of tacit knowledge and latent needs that they may not be aware of. Empathizing with people on a deeper level is the key to coming up with ideas that truly meet their needs and resonate with their desires.
More Tools and Tips:
- Engine Service Design employs a number of methods—including ethnographic user research, empathy tools, and participant journals—which may help in your research: Methods (Engine Service Design)
- “Cultural probes,” like those in the following report, are subjective methods in which the researcher hands over the instruments of observation and inquiry to the research subject: Design Probes (Tuuli Mattelmäki, Aalto University, PDF)
Ideation
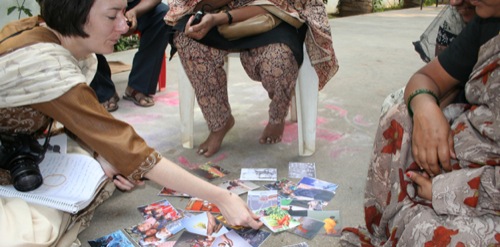
Image via IDEO.
At this point, you may already have some ideas about how to address your design brief, but you should resist the temptation to immediately fix onto your first ideas. You are bound to have other ideas worth entertaining as well. You owe it to your process to create some dedicated time and space for imagination. Setting up a brainstorming session is an effective and efficient way to do this. There are many ways to structure a brainstorm, but the basic aim is always the same: generate as many ideas as quickly and freely as possible.
The innovation consultancy, IDEO, uses a brainstorming method that has become pretty standard for collaborative design groups. It begins with everyone individually generating ideas and writing and/or drawing them on Post-It notes (one idea per Post-It). Then each person presents their ideas, one at a time, as they stick their Post-Its up for everyone to see. While each person is presenting their ideas, the other people in the group keep generating ideas as they are inspired by the ideas being presented. This way everyone’s ideas get heard, and each idea has a chance to spark others.
In addition to these procedural instructions, IDEO has some general rules that it enforces religiously during its brainstorming sessions: “defer judgment; encourage wild ideas; build on the ideas of others; stay focused on the topic; one conversation at a time; be visual; and go for quantity.” To this list, you might also add: think in different scales and durations; allow playful but supportive competition; and, most importantly, have fun.
More Tools and Tips:
- You can read more about IDEO’s brainstorming rules on the company’s open-source innovation platform OpenIDEO: The Rules of Brainstorming (OpenIDEO)
- This brainstorming method is part of a larger “human centered design” process that IDEO has made shareable in a comprehensive toolkit for social innovators: Human Centered Design Toolkit (IDEO)
Synthesis
Once you have most of the ideas out of your head and on the table (or wall, as the case may be), you can begin to look at them all a bit more critically. You should not have done any organization during brainstorming, but because of the way ideas are often built on and inspired by each other, some clusters may have already emerged. Examine these assemblages in relationship to each other and to individual outlying ideas. Pick up and move around your Post-its to try out ideas in different arrangements, but be sure to document and explain each new grouping as you go along. Innovation is often found in the simple translation, combination, or reconfiguration of previously existing ideas.
Deciding which ideas to carry forward can be a delicate process. It will require your team to be both critical and compromising. Take note of what simply generates the most conversation and enthusiasm among the group, but give people a chance to speak up on behalf of less popular ideas as well. Sometimes, placing ideas into categories or a two-by-two grid (with contrasting design considerations—such as expensive vs. inexpensive, competitive versus cooperative, etc.—on opposite ends of the two axes) can help to determine which ideas best incorporate the priorities and values set forth in your design brief. If a clear winner does not rise to the top, you will need to come to consensus or vote on which idea to develop further.
More Tools and Tips:
- Design synthesis is widely seen as a purely inductive reasoning process, but in the following video Jon Kolko of Frog Design explains a more nuanced understanding: Design Synthesis (Jon Kolko, Frog Design)
- In this brief slide presentation, Parsons professor Lara Penin offers a more detailed explanation of how to use a two-by-two grid, or “polarity map,” to analyze design ideas: Polarity Mapping (Lara Penin, Parsons The New School for Design, PDF)
Prototyping
As soon as you have some direction, you shouldstart making your ideas real as soon as possible. Don’t worry about finalizing your design or making it pretty yet. There will be time for that later. Make models of your design that reveal, not conceal, its flaws. Early prototypes are not meant for presentation; they’re meant to be tested and broken. It might seem premature or inefficient to spend time fabricating a prototype of an idea you’ve only just come up with, but it will save you time in the long run. Thinking by making will reveal things that abstract thinking does not.
Prototypes will take different forms, depending on what you are designing. Simple models or mock-ups will work for physical or digital designs, but less tangible services or experiences will need to be tested through performance, storyboarding, or other forms of narrative modeling. Test pieces and parts of your design when the whole is not testable. Don’t waste time on every last detail. Don’t waste money on expensive materials. Work with what you have on hand to create props, personas, and Frankenstein monsters—whatever you need to do to see and feel what’s working and what’s not.
More Tools and Tips:
- Service blueprints, customer journey maps, and interaction storyboards are relatively new tools for modeling designs with different “touch-points” that users experience over time: Testing & Prototyping (Service Design Tools)
- The Customer Journey Canvas, from the new book, This Is Service Design Thinking, is a comprehensive framework for visualizing services and other experiential designs: The Customer Journey Canvas (This is Service Design Thinking)
Implementation
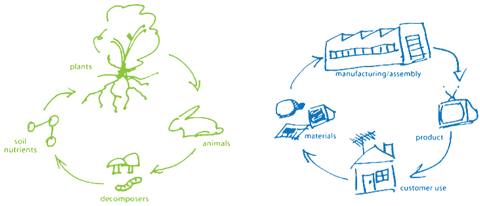
Image via MBDC.
At some point, it will finally be time to release your designs into the wild. This could happen at various stages of the process, with your design at various stages of completion. It could simply be a concept intended to start a larger conversation. It could be a prototype that has evolved into something presentable enough to be tried out on a larger audience for beta testing. Or it could be something that feels more finished. Enough iteration will allow you to sense when isolated testing is having diminishing returns and your design is ready for public consumption.
Just remember that you are responsible for what you design. Once it is out in the real world, it will start to have real consequences. Over the course of a design’s lifecycle, it may touch people and places beyond those it was intended for. Before rushing to implementation, try to visualize all potential side effects, distant stakeholders, and ecological implications. Think about how your design will be made, and also about how it will be disposed of. Think about how it might be recycled, repurposed, or shared. These might seem like distant considerations, but your choices now will influence how your design is used in the future. That’s right: you’re designing the future, so make it good.
More Tools and Tips:
- If bringing your design to life involves bringing it to market, a business model template can help you visualize your value proposition, delivery channels, revenue streams, etc.: Business Model Canvas (Business Model Generation)
- The bottom line isn’t the end of the line for any design. Truly sustainable, “Cradle-to-Cradle,” designs demonstrate equal respect for economy, equality, and ecology: Cradle-to-Cradle Framework (McDonough Braungart Design Chemistry)